
Connect LeadConnector
Connect LeadConnector and put your records on the map.

Put your LeadConnector accounts, contacts and deals on the map so reps can see what's nearby and managers can see coverage at a glance.
1. Open Data Sources
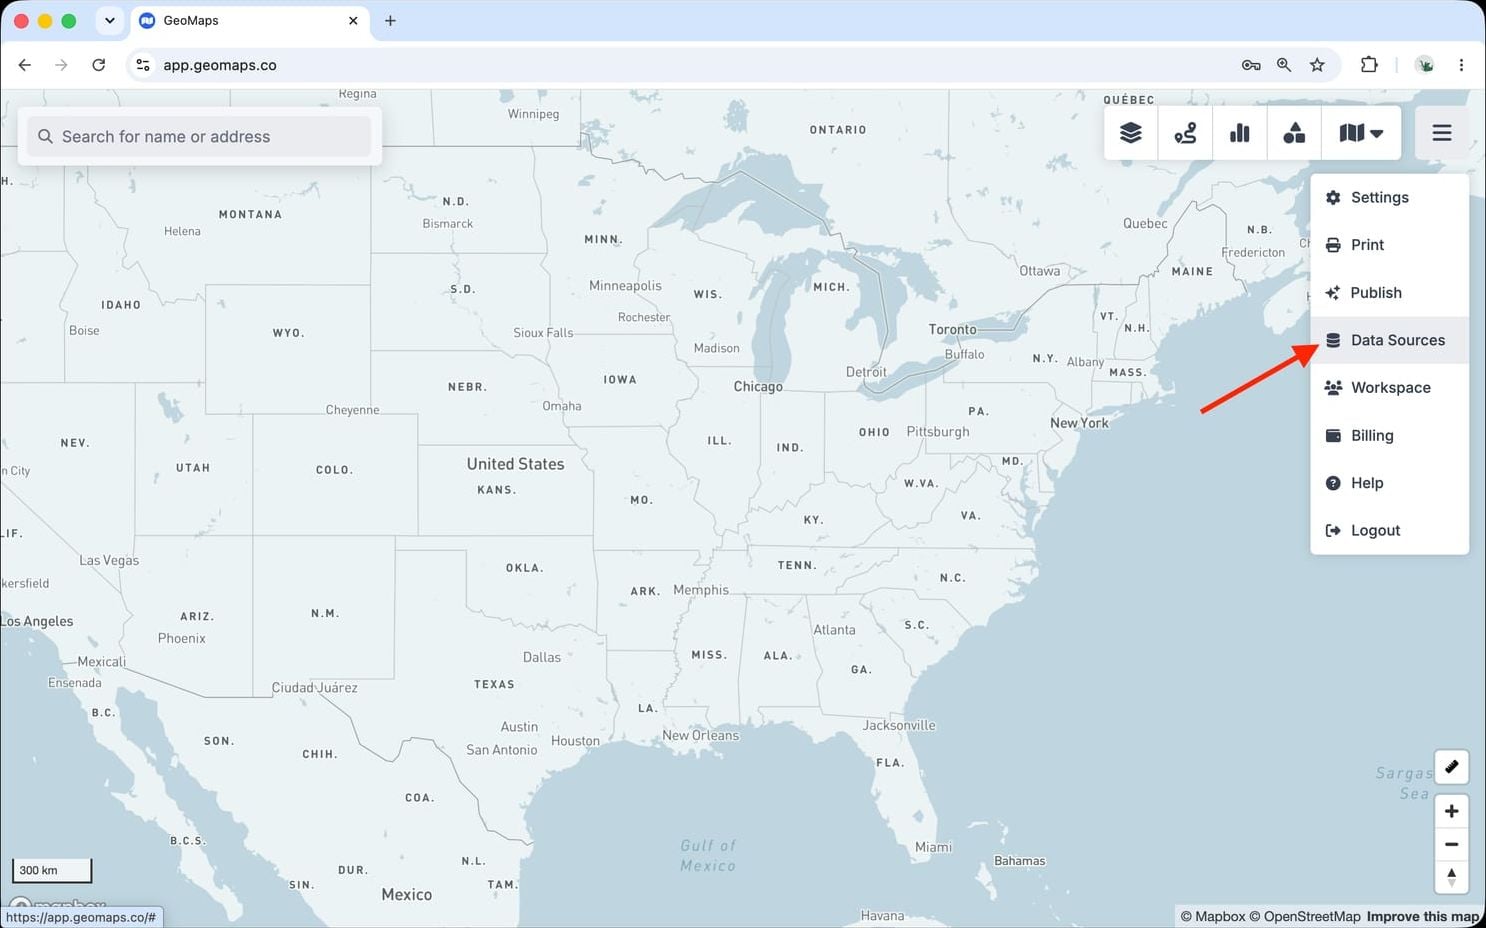
In GeoMaps, open the menu in the top-right corner of the map and choose Data Sources. Add a new source and select LeadConnector to open its connection form.
2. Connect LeadConnector
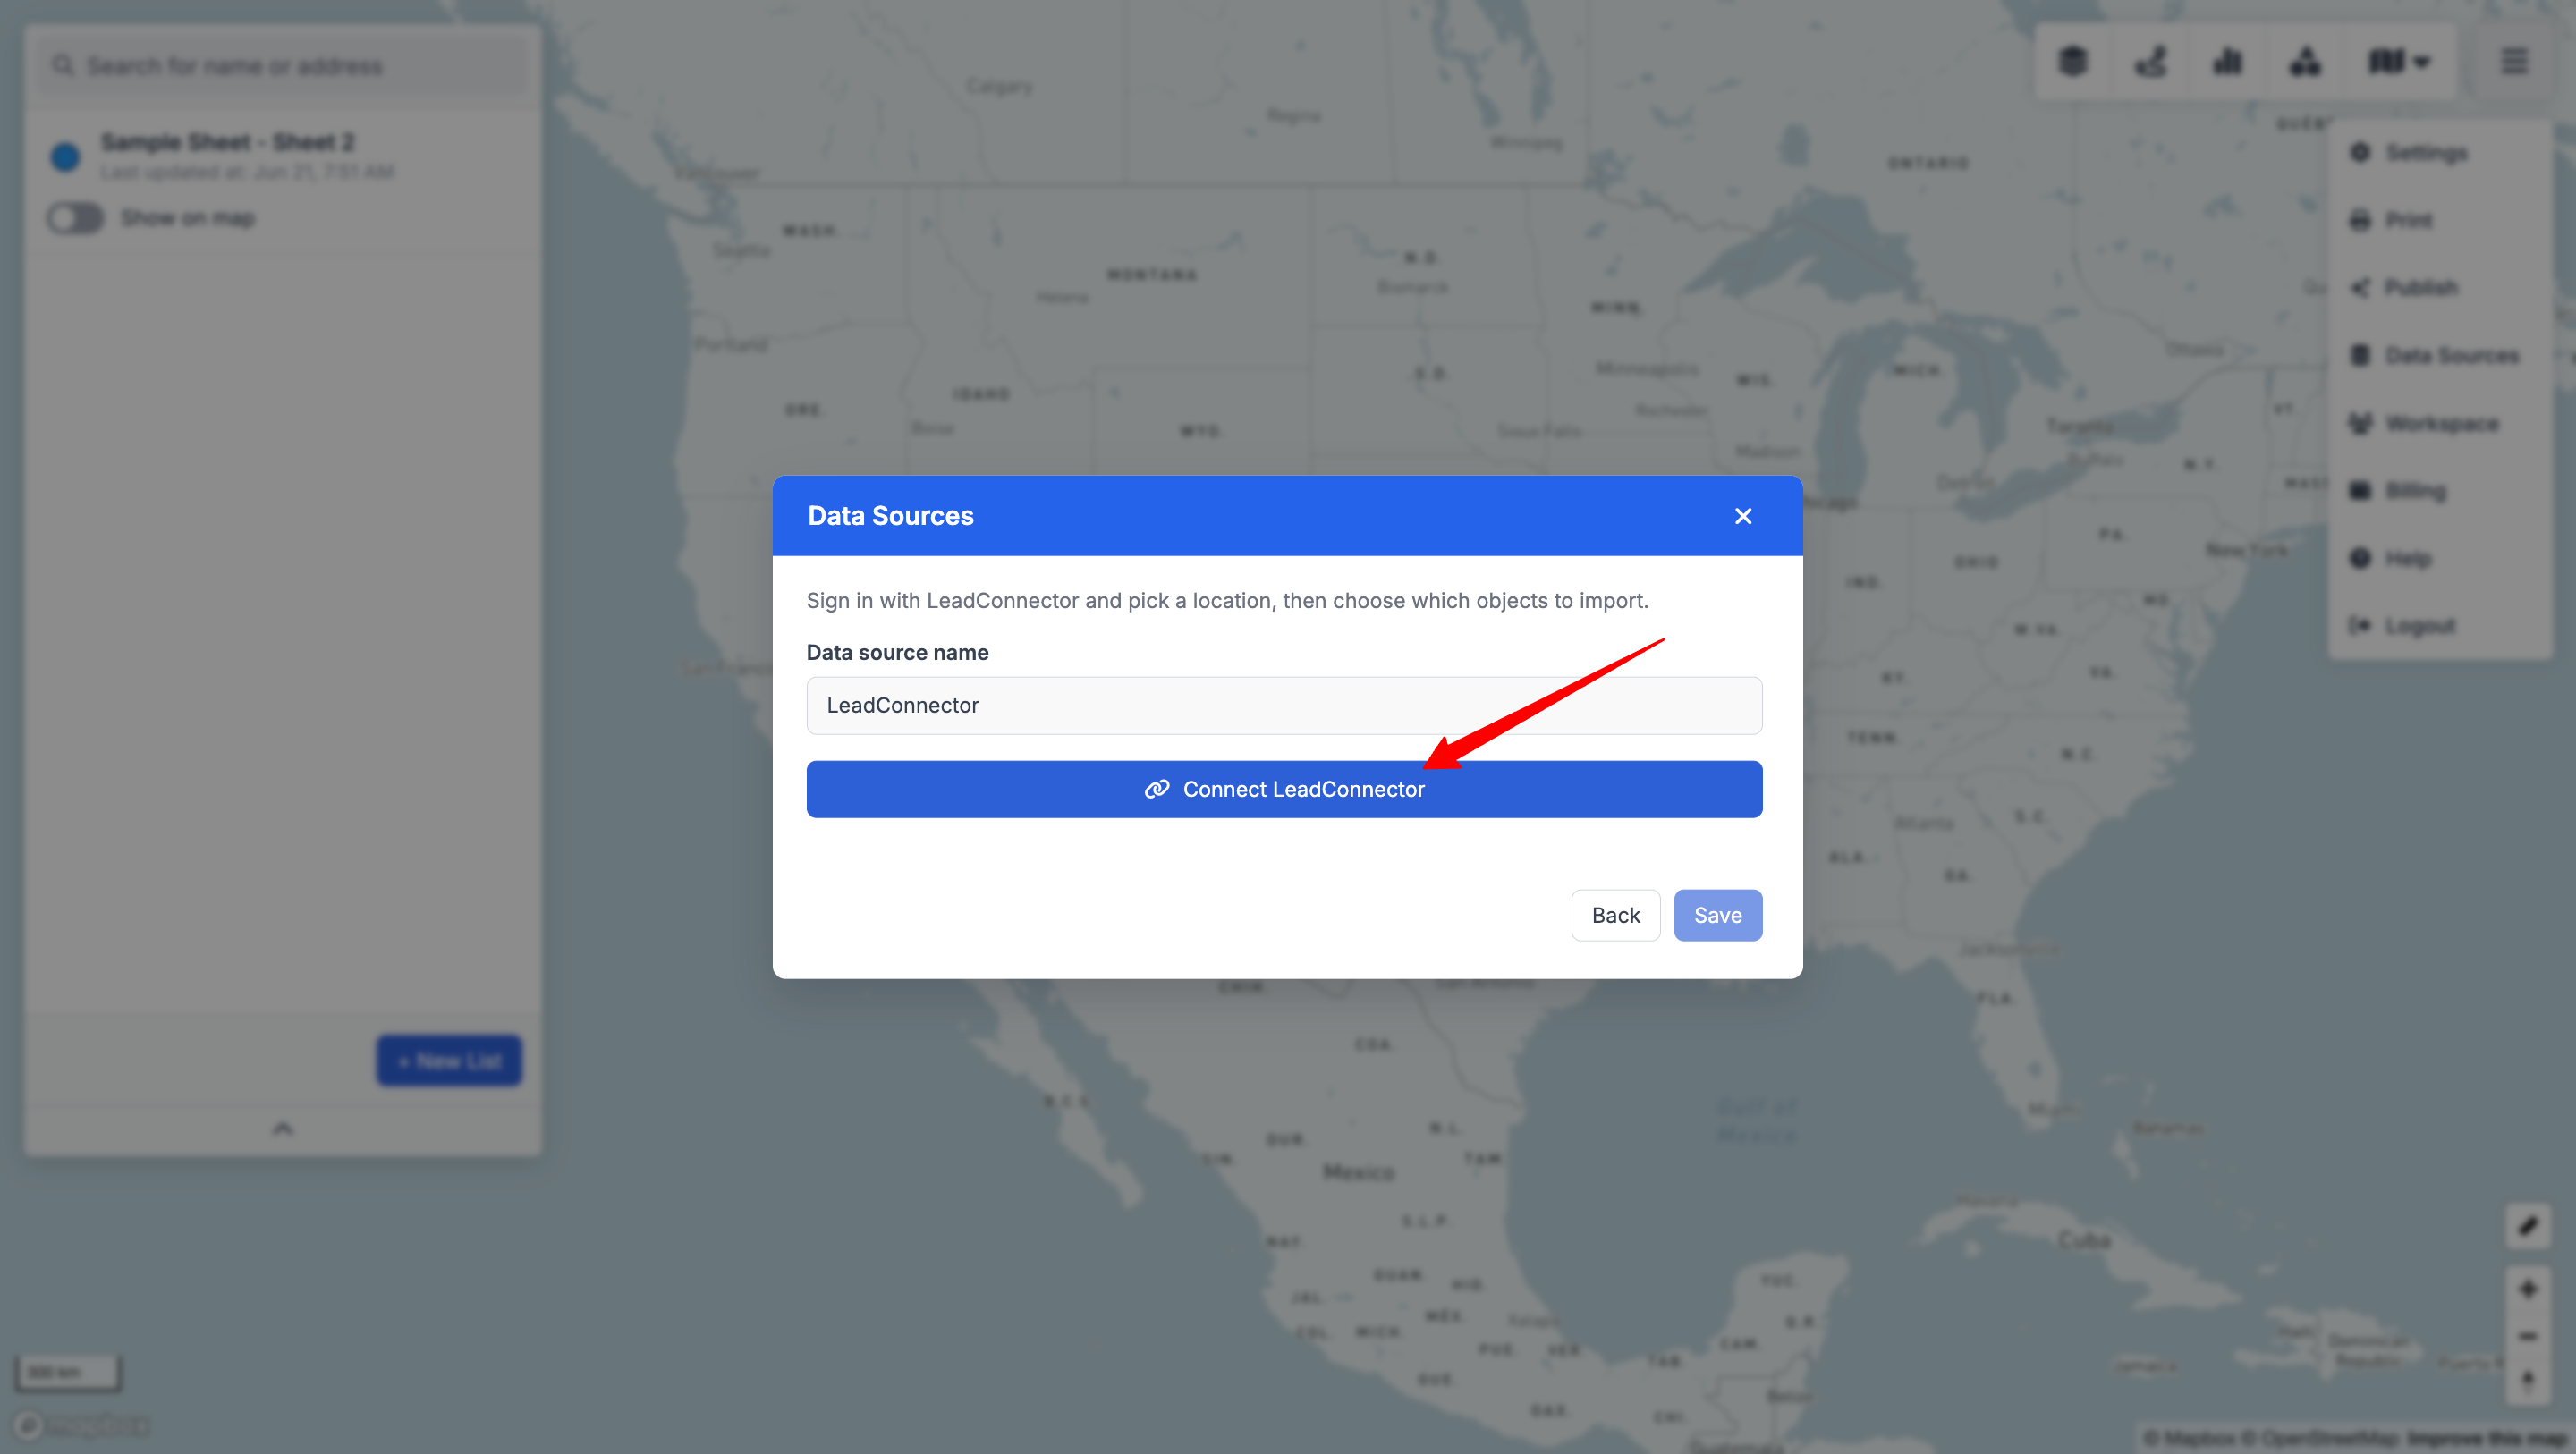
LeadConnector connects with a secure sign-in at the sub-account (location) level.
- Click Connect LeadConnector and sign in.
- Pick the location to connect and approve read access.
- Choose the objects to import — Contacts, Opportunities or Appointments.
Connect one location at a time; add another connection for each sub-account you manage.
3. Choose what to map
Pick the object(s) you want to plot and confirm which field holds the address (GeoMaps suggests one for you). Every record is geocoded and dropped on the map, then kept in sync on a schedule as your data changes.
Still need help? Contact our team.